mirror of
https://github.com/bluxmit/alnoda-workspaces.git
synced 2024-09-30 17:26:14 +13:00
918 lines
40 KiB
Markdown
918 lines
40 KiB
Markdown
# Python workspace
|
||
|
||
Python development enviroment inside the isolated docker container. Includes VS-code IDE,
|
||
job scheduler and other tools for linting, testing, auto-documentation and profiling.
|
||
|
||
<p align="center">
|
||
<img src="https://raw.githubusercontent.com/bluxmit/alnoda-workspaces/main/workspaces/python-workspace/img/python-wid-collage.png" alt="Collage">
|
||
</p>
|
||
|
||
Try it out
|
||
|
||
```
|
||
docker run --name space-1 -d -p 8020-8035:8020-8035 alnoda/python-workspace
|
||
```
|
||
|
||
and open [localhost:8020](http://localhost:8020) in browser.
|
||
|
||
## Contents
|
||
|
||
* [About](#about)
|
||
* [Code Editor](#code-editor)
|
||
* [Why this workspace](#why-this-workspace)
|
||
* [Launch Workspace](#launch-workspace)
|
||
* [Start local workspace](#start-local-workspace)
|
||
* [Understanding ports](#understanding-ports)
|
||
* [Workspace terminal](#workspace-terminal)
|
||
* [Multiple workspaces](#multiple-workspaces)
|
||
* [Docker in docker](#docker-in-docker)
|
||
* [Run on remote server](#run-on-remote-server)
|
||
* [Unsecure remote workspace](#unsecure-remote-workspace)
|
||
* [Secure remote workspace](#secure-remote-workspace)
|
||
* [Use Workspace](#use-workspace)
|
||
* [IPython and Notebooks](#ipython-and-notebooks)
|
||
* [Schedule Python jobs](#schedule-python-jobs)
|
||
* [Python tooling](#python-tooling)
|
||
* [Python-report](#python-report)
|
||
* [Pytest-html-reporter](#pytest-html-reporter)
|
||
* [Pdoc3](#pdoc3)
|
||
* [SnakeViz](#snakeviz)
|
||
* [Vprof](#vprof)
|
||
* [Flameprof](#flameprof)
|
||
* [Pyinstrument](#pyinstrument)
|
||
* [cProfile](#cprofile)
|
||
* [Pylint-json2html](#pylint-json2html)
|
||
* [Pre-commit](#pre-commit)
|
||
* [Common workspace actions](#common-workspace-actions)
|
||
* [Install applications](#install-applications)
|
||
* [Schedule jobs with Cron](#schedule-jobs-with-cron)
|
||
* [Python](#python)
|
||
* [Node.js](#node.js)
|
||
* [Run applications and services inside the workspace](#run-applications-and-services-inside-the-workspace)
|
||
* [Manage workspaces](#manage-workspaces)
|
||
* [Start and stop workspaces](#start-and-stop-workspaces)
|
||
* [Create new workspace image](#create-new-workspace-image)
|
||
* [Manage workspace images](#manage-workspace-images)
|
||
* [Save and load workspace images](#save-and-load-workspace-images)
|
||
* [Save workspace as a file](#save-workspace-as-a-file)
|
||
* [Push workspace to a docker registry](#push-workspace-to-a-docker-registry)
|
||
* [Move workspace to the cloud](#move-workspace-to-the-cloud)
|
||
* [Workspace Documentation](#workspace-documentation)
|
||
|
||
|
||
## About
|
||
The workspace contains browser-based Visual Studio Code and multiple tools which make working with Python in docker more convenient.
|
||
|
||
<div align="center" style="font-style: italic;">
|
||
Demo: Python workspace
|
||
</div>
|
||
|
||
<p align="center">
|
||
<img src="https://raw.githubusercontent.com/bluxmit/alnoda-workspaces/main/workspaces/python-workspace/img/python-wid.gif" alt="Htop" width="900">
|
||
</p>
|
||
|
||
**Python tools:**
|
||
|
||
- [IPython and Notebooks](https://ipython.readthedocs.io/en/stable/)
|
||
- [Pdoc3](https://github.com/pdoc3/pdoc)
|
||
- [Pytest-html-reporter](https://github.com/prashanth-sams/pytest-html-reporter)
|
||
- [SnakeViz](https://jiffyclub.github.io/snakeviz/)
|
||
- [Vprof](https://github.com/nvdv/vprof)
|
||
- [Pyinstrument](https://pypi.org/project/pyinstrument/3.0.0b3/)
|
||
- [Flameprof](https://github.com/baverman/flameprof/)
|
||
- [Pylint-json2html](https://github.com/Exirel/pylint-json2html)
|
||
- [Pre-commit](https://pre-commit.com/)
|
||
- [Flake8](https://flake8.pycqa.org/en/latest/)
|
||
- [Poetry](https://python-poetry.org/)
|
||
- [Black](https://github.com/psf/black)
|
||
|
||
*(These are only some of packages installed. Check the full list in requirements.txt files in folder `/home/abc/installed-python-packages`)*
|
||
|
||
**Workspace tools with UI:**
|
||
|
||
- **Workspace UI** - Browser-based UI for the Workspace. Launch all workspace tools from one place. Customize to your yown needs.
|
||
- [**Eclipse Theia**](https://theia-ide.org/docs/) - open source version of popular Visual Studio Code IDE. Theia is trully open-source, has
|
||
VS-Code extensions and works in browser. This means it can run inside a docker container on local machine or in cloud. A lot of beautiful color themes and many common plugins are already installed to save time.
|
||
- [**Terminal**](https://github.com/tsl0922/ttyd) - secure browser-based terminal.
|
||
- [**FileBrowser**](https://github.com/filebrowser/filebrowser) - manage files and folders inside the workspace, and exchange data between local environment and the workspace
|
||
- [**Cronicle**](https://github.com/jhuckaby/Cronicle) - task scheduler and runner, with a web based front-end UI. It handles both scheduled, repeating and on-demand jobs, targeting any number of worker servers, with real-time stats and live log viewer.
|
||
- [**Static File Server**](https://github.com/vercel/serve) - view any static html sites as easy as if you do it on your local machine. Serve static websites easily.
|
||
- [**Ungit**](https://github.com/FredrikNoren/ungit) - rings user friendliness to git without sacrificing the versatility of it.
|
||
- [**MkDocs**](https://squidfunk.github.io/mkdocs-material/) - maintain documentation for your workspace or project with only markdown.
|
||
- [**Midnight Commander**](https://midnight-commander.org/) - Feature rich visual file manager with internal text viewer and editor.
|
||
- [**Process Monitor**](https://htop.dev/) - Monitor running process and resource utilization.
|
||
|
||
**Other:**
|
||
- Docker in docker
|
||
- [Zsh](https://www.zsh.org/), [Oh my Zsh](https://ohmyz.sh/)
|
||
- Python 3, Pip
|
||
- Node/nodeenv
|
||
- git, git-flow
|
||
- curl, wget, telnet, jq,
|
||
- nano, vim, mc, ncdu, htop
|
||
- supervisord
|
||
- cron
|
||
|
||
## Code Editor
|
||
|
||
The main code editor of this workspace is [**Eclipse Theia**](https://theia-ide.org/docs/) - an open-source version of popular Visual Studio Code IDE.
|
||
despite Eclipse Theia is a browser-based code editor, it is fast, responsive, and full-featured. It features code highlighting, autocompletion,
|
||
rendering of notebooks has a tree-based file browser and a great number of pre-installed color themes.
|
||
|
||
You can install any extension from [open-vsx.org](https://open-vsx.org/) that has hundreeds of extensions for VS Code compatible editors.
|
||
|
||
<div align="center" style="font-style: italic;">
|
||
Demo: Eclipse Theia
|
||
</div>
|
||
|
||
<p align="center">
|
||
<img src="https://raw.githubusercontent.com/bluxmit/alnoda-workspaces/main/workspaces/workspace-in-docker/img/theia.gif" alt="Theia demo" width="900">
|
||
</p>
|
||
|
||
## Why this workspace
|
||
|
||
This is a dockerized workspace - an environment completely isolated inside a docker container. It can run anywhere, can be started and stopped, moved to another machine, or archived.
|
||
Read in detail about the [advantages of the dockerized workspace](https://github.com/bluxmit/alnoda-workspaces/blob/main/README.md#why-workspace-in-docker)
|
||
and the [situations when workspace is a good choice](https://github.com/bluxmit/alnoda-workspaces/blob/main/README.md#use-cases)
|
||
|
||
**TLDR:** This workspace might be quite useful when you want to:
|
||
|
||
- Avoid the tedious process of setting dev environment on your laptop
|
||
- Work conveniently with multiple IT projects on the same laptop, and switching between them made simple
|
||
- Move all your work to another machine easily
|
||
- Start working right away in the workspace prepared for the task
|
||
- Run dev environment in cloud and work from any device, be independent on any cloud service or cloud provider
|
||
- Back-up entire workspaces with important work, save versions of the workspaces before changes
|
||
- Collaborate by sharing the entire workspace or run it in the cloud
|
||
- Move from dev to POC/MVP in a minute
|
||
- Make experiments (try new packages, versions, frameworks) without risking affecting existing environment
|
||
- With a single command start, stop and resume job schedules, related to the same project
|
||
- Create a custom dev environment for your team, and help new-comers to save time on setting up their environments
|
||
- Move dev environment back and forth between powerful Windows PC and macOS laptop in minutes
|
||
|
||
|
||
## Launch Workspace
|
||
|
||
### Start local workspace
|
||
|
||
Workspaces - are merely docker containers, that's why managing workspaces is easy and intuitive - it is enough to know only docker commands,
|
||
no need to learn any new tools.
|
||
|
||
In order to avoid confusion, the following convention is adopted:
|
||
|
||
```sh
|
||
command to execute outside of the workspace
|
||
```
|
||
|
||
> `command to execute inside the workspace (after entering running docker container)`
|
||
|
||
To start a workspace simply execute in terminal
|
||
|
||
```sh
|
||
docker run --name space-1 -d -p 8020-8035:8020-8035 alnoda/python-workspace
|
||
```
|
||
|
||
*(It is recommended to run workspace in the daemon mode)*
|
||
|
||
***Open [http://localhost:8020](http://localhost:8020)***
|
||
|
||
Workspace has its own UI, which includes quiklaunch (home) page and documentation pages.
|
||
From the quiklaunch you can open any workspace tool. Documentation pages you modify in order
|
||
to document the project, workspace use and setup.
|
||
|
||
### Understanding ports
|
||
In a previous section workspace was started with a port range mapping ***-p 8020-8035***.
|
||
This is because workspace contains a set of applications with browser-based UI
|
||
|
||
| Port | Application |
|
||
| --------- | ------------------------- |
|
||
| 8020 | Workspace UI |
|
||
| 8021 | Filebrowser |
|
||
| 8022 | Static file server |
|
||
| 8023 | Cronicle |
|
||
| 8024 | Ungit |
|
||
| 8025 | VS-Code (Theia) |
|
||
| 8026 | Terminal |
|
||
| 8027 | Midnight Commander |
|
||
| 8028 | Htop |
|
||
|
||
You don't need to memorize these ports. Python workspace has UI from where you can open any of these applications.
|
||
Open [localhost:8020](http://localhost:8020), and from there open other applications included in the workspace.
|
||
|
||
<div align="center" style="font-style: italic;">
|
||
Demo: Python workspace UI (dark mode)
|
||
</div>
|
||
|
||
<p align="center">
|
||
<img src="https://raw.githubusercontent.com/bluxmit/alnoda-workspaces/main/workspaces/python-workspace/img/python-workspace-ui.png" alt="python-workspace-ui.png" width="750">
|
||
</p>
|
||
|
||
The rest of the ports from the port range can be used in order to expose optional applications, or applications you might
|
||
install in future. So we map several extra ports just inn case.
|
||
|
||
Python workspace has the following browser-based applications installed, but not started by default
|
||
|
||
1) **Vprof** is a Python package providing rich and interactive visualizations for various Python program characteristics such as running time and memory usage.
|
||
|
||
> `cd /home/examples/simple-script && vprof -H 0.0.0.0 -p 8031 -c cpmh fib.py `
|
||
|
||
**NOTE:** It is not a problem if you don't expose any ports from the start. If later on you realise that other ports are needed,
|
||
you will simply [commit workspace to a new image, and start the workspace again with more ports](#create-new-image).
|
||
|
||
2) **Snakeviz** is a python profiling visualizer
|
||
|
||
> `cd /home/examples/simple-script && python -m cProfile -o script.prof script.py `
|
||
> `snakeviz -s -p 8030 -H 0.0.0.0 script.prof `
|
||
|
||
and open in your browser http://0.0.0.0:8030/snakeviz/%2Fhome%2Fexamples%2Fsimple-script%2Fscript.prof
|
||
|
||
### Multiple workspaces
|
||
|
||
Typically you would run one workspace at a time, but there might be cases when launching more than one workspace might be needed.
|
||
Every workspace needs a range of ports. If one workspace is up and running, and uses the default port range, then ports 8020-8035 are taken.
|
||
|
||
Python workspace itself uses 9 ports (8020-8028), but it is recommended to map several extra ports for the applications you
|
||
will launch when working in the workspace, for example, Snakeviz or Vprof. Having extra ports,
|
||
you can always launch new applications on these ports, and they will be immediately exposed outside of the workspace.
|
||
|
||
In order to start another workspace we need to provide a different port range, for example
|
||
|
||
```sh
|
||
docker run --name space-2 -d -p 8040-8055:8020-8035 -e ENTRY_PORT=8040 alnoda/python-workspace
|
||
```
|
||
|
||
Notice that in addition we set environmental variable ***ENTRY_PORT***, which should be equal to the first port in the new range.
|
||
Environmental variable ENTRY_PORT tells workspace that non-default port range is used, for Workspace UI to open applications
|
||
on proper ports in browser.
|
||
|
||
### Workspace terminal
|
||
|
||
Terminnal - is one of the main developer tools. There are several ways how to work with terminal of the workspace:
|
||
|
||
- built-it in-browser terminal
|
||
- use terminal provided by in-browser IDE [http://localhost:8025](http://localhost:8025) ([unless other ports are mapped](#multiple-workspaces))
|
||
- ssh into the running the docker container (of the workspace) from your terminal
|
||
|
||
<div align="center" style="font-style: italic;">
|
||
Demo: Browser-based terminal
|
||
</div>
|
||
|
||
<p align="center">
|
||
<img src="https://raw.githubusercontent.com/bluxmit/alnoda-workspaces/main/workspaces/python-workspace/img/python-terminal.gif" alt="python-terminal.gif" width="750">
|
||
</p>
|
||
|
||
*(Browser-based terminals always work under the user you started the workspace with, the default is non root user "abc")*
|
||
|
||
If you want to enter running workspace container from your terminal execute:
|
||
```sh
|
||
docker exec -it space-1 /bin/zsh
|
||
```
|
||
|
||
If you don't want to use z-shell
|
||
```
|
||
docker exec -it space-1 /bin/bash
|
||
```
|
||
|
||
This way allows to ssh into the workspace as a root user at any time, even if the workspace itself was not starter as root user (the default user is abc)
|
||
|
||
```sh
|
||
docker exec -it --user=root space-1 /bin/zsh
|
||
```
|
||
|
||
You can work in Ubuntu terminal now. Execute the followinng command to know your workspace user
|
||
|
||
> `whoami`
|
||
|
||
### Docker in docker
|
||
|
||
It is possible to work with docker directly from the workspace (using workspace terminal).
|
||
|
||
```
|
||
docker run --name space-1 -d -p 8020-8035:8020-8035 -v /var/run/docker.sock:/var/run/docker.sock alnoda/python-workspace
|
||
```
|
||
|
||
NOTE: in order to use docker in docker you need to or enter into the workspace container as root
|
||
```sh
|
||
docker exec -it --user=root space-1 /bin/zsh
|
||
```
|
||
|
||
### Run on remote server
|
||
|
||
Because workspace is just a docker image, running it in any other server is as easy as running it on local laptop.
|
||
|
||
Running on remote server makes it much simpler to collaborate, because you can just share credentials to the workspace with your peers, and they will be able to use it.
|
||
You can also run applications that should run permanently, and run jobs on schedule.
|
||
|
||
#### Unsecure remote workspace
|
||
|
||
The simplest deployment of the workspace requires only 3 steps:
|
||
|
||
- get virtual server on your favourite cloud (Digital Ocean, Linode, AWS, GC, Azure ...)
|
||
- [install docker](https://docs.docker.com/engine/install/) on this server
|
||
- ssh to the remote server and start workspace
|
||
|
||
```
|
||
docker run --name space-1 -d -p 8020-8035:8020-8035 -e WRK_HOST="<ip-of-your-remote-server>" alnoda/python-workspace
|
||
```
|
||
|
||
**NOTE:** When running workspace on the remote server, add envronmental variable `-e WRK_HOST="<ip-of-your-remote-server>"`.
|
||
Workspace UI needs this variable to know how redirect properly to the workspace applications' UIs.
|
||
|
||
Open in your browser `<ip-of-your-remote-server>:8020`
|
||
|
||
If docker-in-docker is required, then
|
||
|
||
```
|
||
docker run --name space-1 -d -p 8020-8035:8020-8035 -e WRK_HOST="<ip-of-your-remote-server>" -v /var/run/docker.sock:/var/run/docker.sock alnoda/python-workspace
|
||
```
|
||
|
||
This way launches workspace in cloud, but such workspace would not be secure, everyone who knows IP of your server will be able to use it. You should
|
||
use this method only if you launch workspace in the secure internal network or inside a VPN.
|
||
|
||
#### Secure remote workspace
|
||
|
||
*You might want to restrict access to the cloud workspace, and secure encrypted communication with it*
|
||
|
||
There are many situations when running workspace in the public network over Internet is required. This can be done
|
||
by running the Workspace behind the reverse proxy over secure encrypted HTTPS protocol with authentication. [Here](https://github.com/bluxmit/alnoda-workspaces/blob/main/workspaces/ansible-terraform-workspace/docs/example-compose.md) is the example of a
|
||
docker-compose file that launches another workspace (Ansible-Terrafom workspace) behind the proxy with middlewares that enable HTTPS and auth (TLS certificates are
|
||
not included in the example). For some engineers it might be an easy task to make such a thing, but for many who do not have experience in this area,
|
||
this would be a daunting task that can easily consume several days of your life. That's why Python workspace comes with a nice little tool, that generates a docker-compose project
|
||
(including certificates and passwords) to easily, securely and without hassle launch workspace on any cloud server
|
||
|
||
***Python-workspace contains utility that will generate everything needed to launch the workspace in cloud in a secure way, with authentication and with TLS.***
|
||
|
||
If you would like to run workspace on the remote server securely, launch a workspace on your local laptop first, open its terminal and
|
||
use utility `/home/abc/utils/remote.py` to generate create docker-compose project with TLS certificates. Simply execute
|
||
|
||
> `python /home/abc/utils/remote.py --workspace="python-workspace" --port="<ENTRY_PORT>" --host="<IP_OF_CLOUD_SERVER_WITH_PUBLIC_ACCESS>" --user="<ANY_USER_NAME>" --password="<ANY_USER_PASSWORD>"`
|
||
|
||
*(you can skip `--port`, 8020 will be a default)*
|
||
|
||
for example:
|
||
|
||
> `python /home/abc/utils/remote.py --workspace="python-workspace" --host="68.183.69.198" --user="user1" --password="pass1"`
|
||
|
||
**NOTE:** you have to specify the correct host (IP of the server you want to run the workspace on), and user and password of your choice.
|
||
|
||
After the command is executed, you will see folder `/home/abc/utils/remote` is created. Download it out from the workspace to the local environment using the Filebrowser:
|
||
|
||
<p align="center">
|
||
<img src="https://raw.githubusercontent.com/bluxmit/alnoda-workspaces/main/workspaces/python-workspace/img/generate-remote.gif" alt="generate-remote.gif" width="750">
|
||
</p>
|
||
|
||
|
||
. Copy this folder to the remote server where you want to launch the Python workspace.
|
||
You can use cyberduck or [scp](https://kb.iu.edu/d/agye). ssh to the server, cd to the directory you copied and execute
|
||
|
||
```sh
|
||
docker-compose up -d
|
||
```
|
||
|
||
That's it, you workspace is running securely on the remote server, using
|
||
self-signed TLS certificates for encrypted https communication between you laptop and the remote workspace, and authentication is added.
|
||
|
||
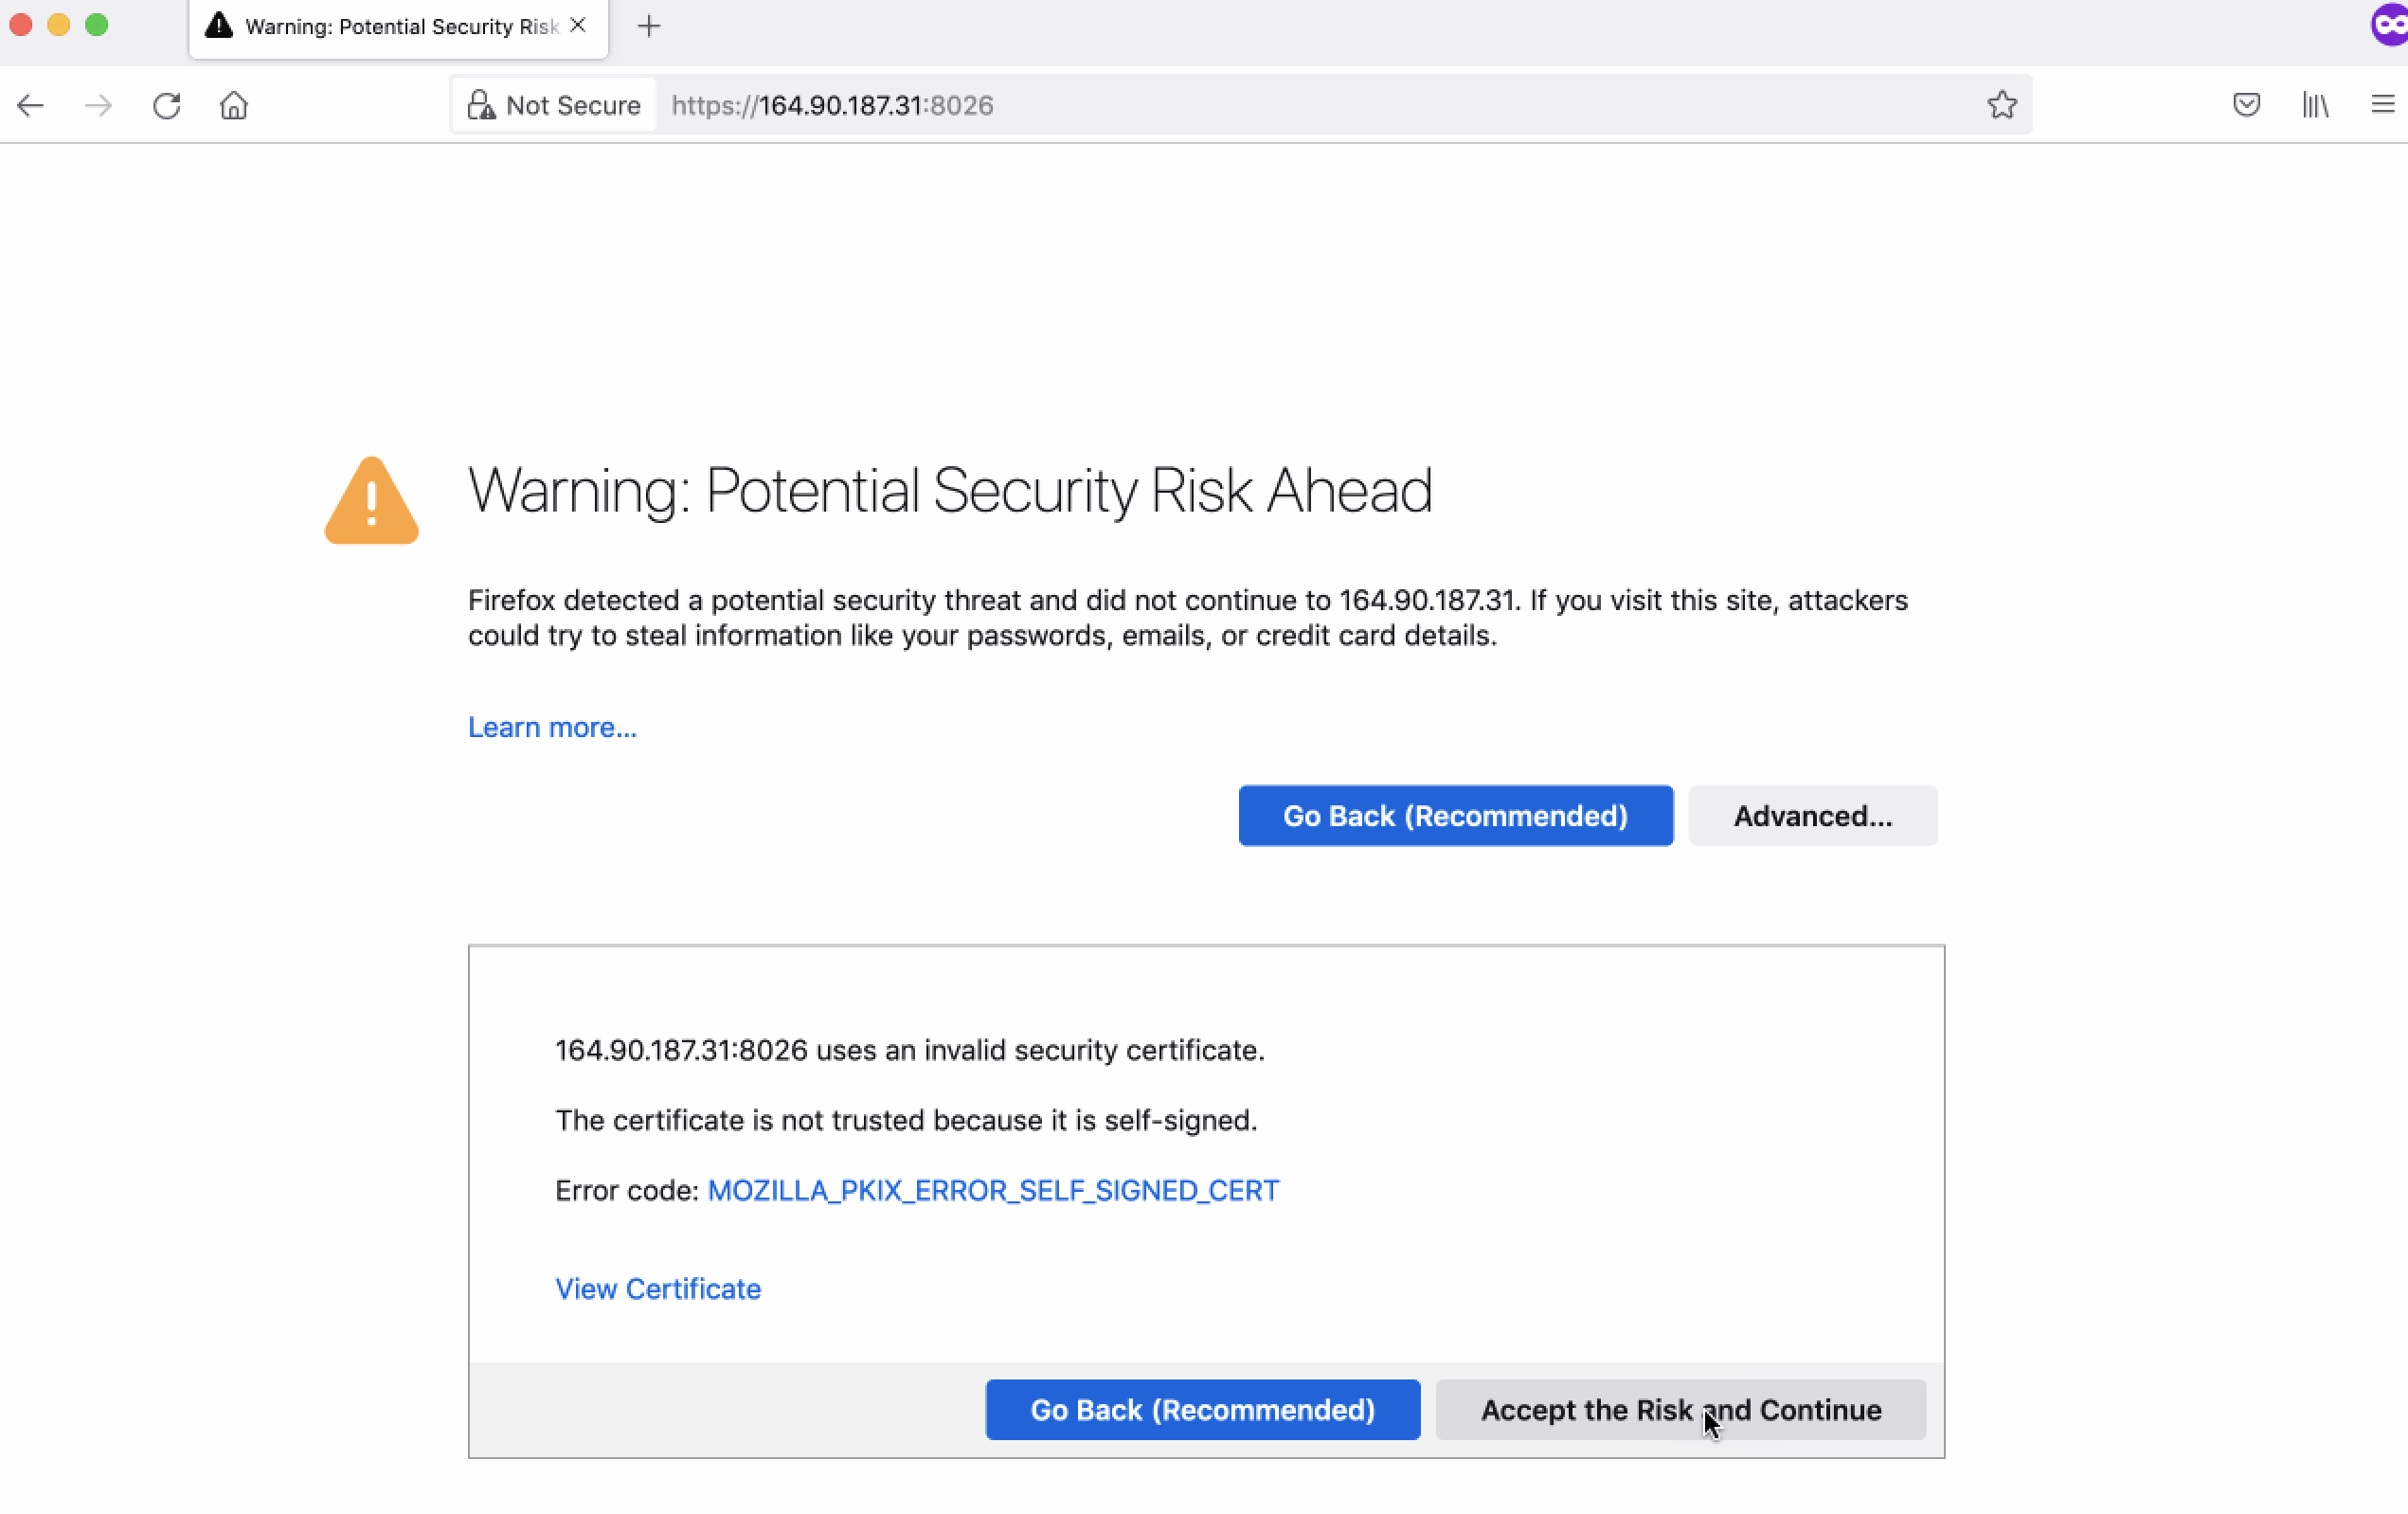
**NOTE:** The HTTPS is with self-signed certificate, and your browser will show a warning, asking you to accept the risk
|
||
|
||
|
||
|
||
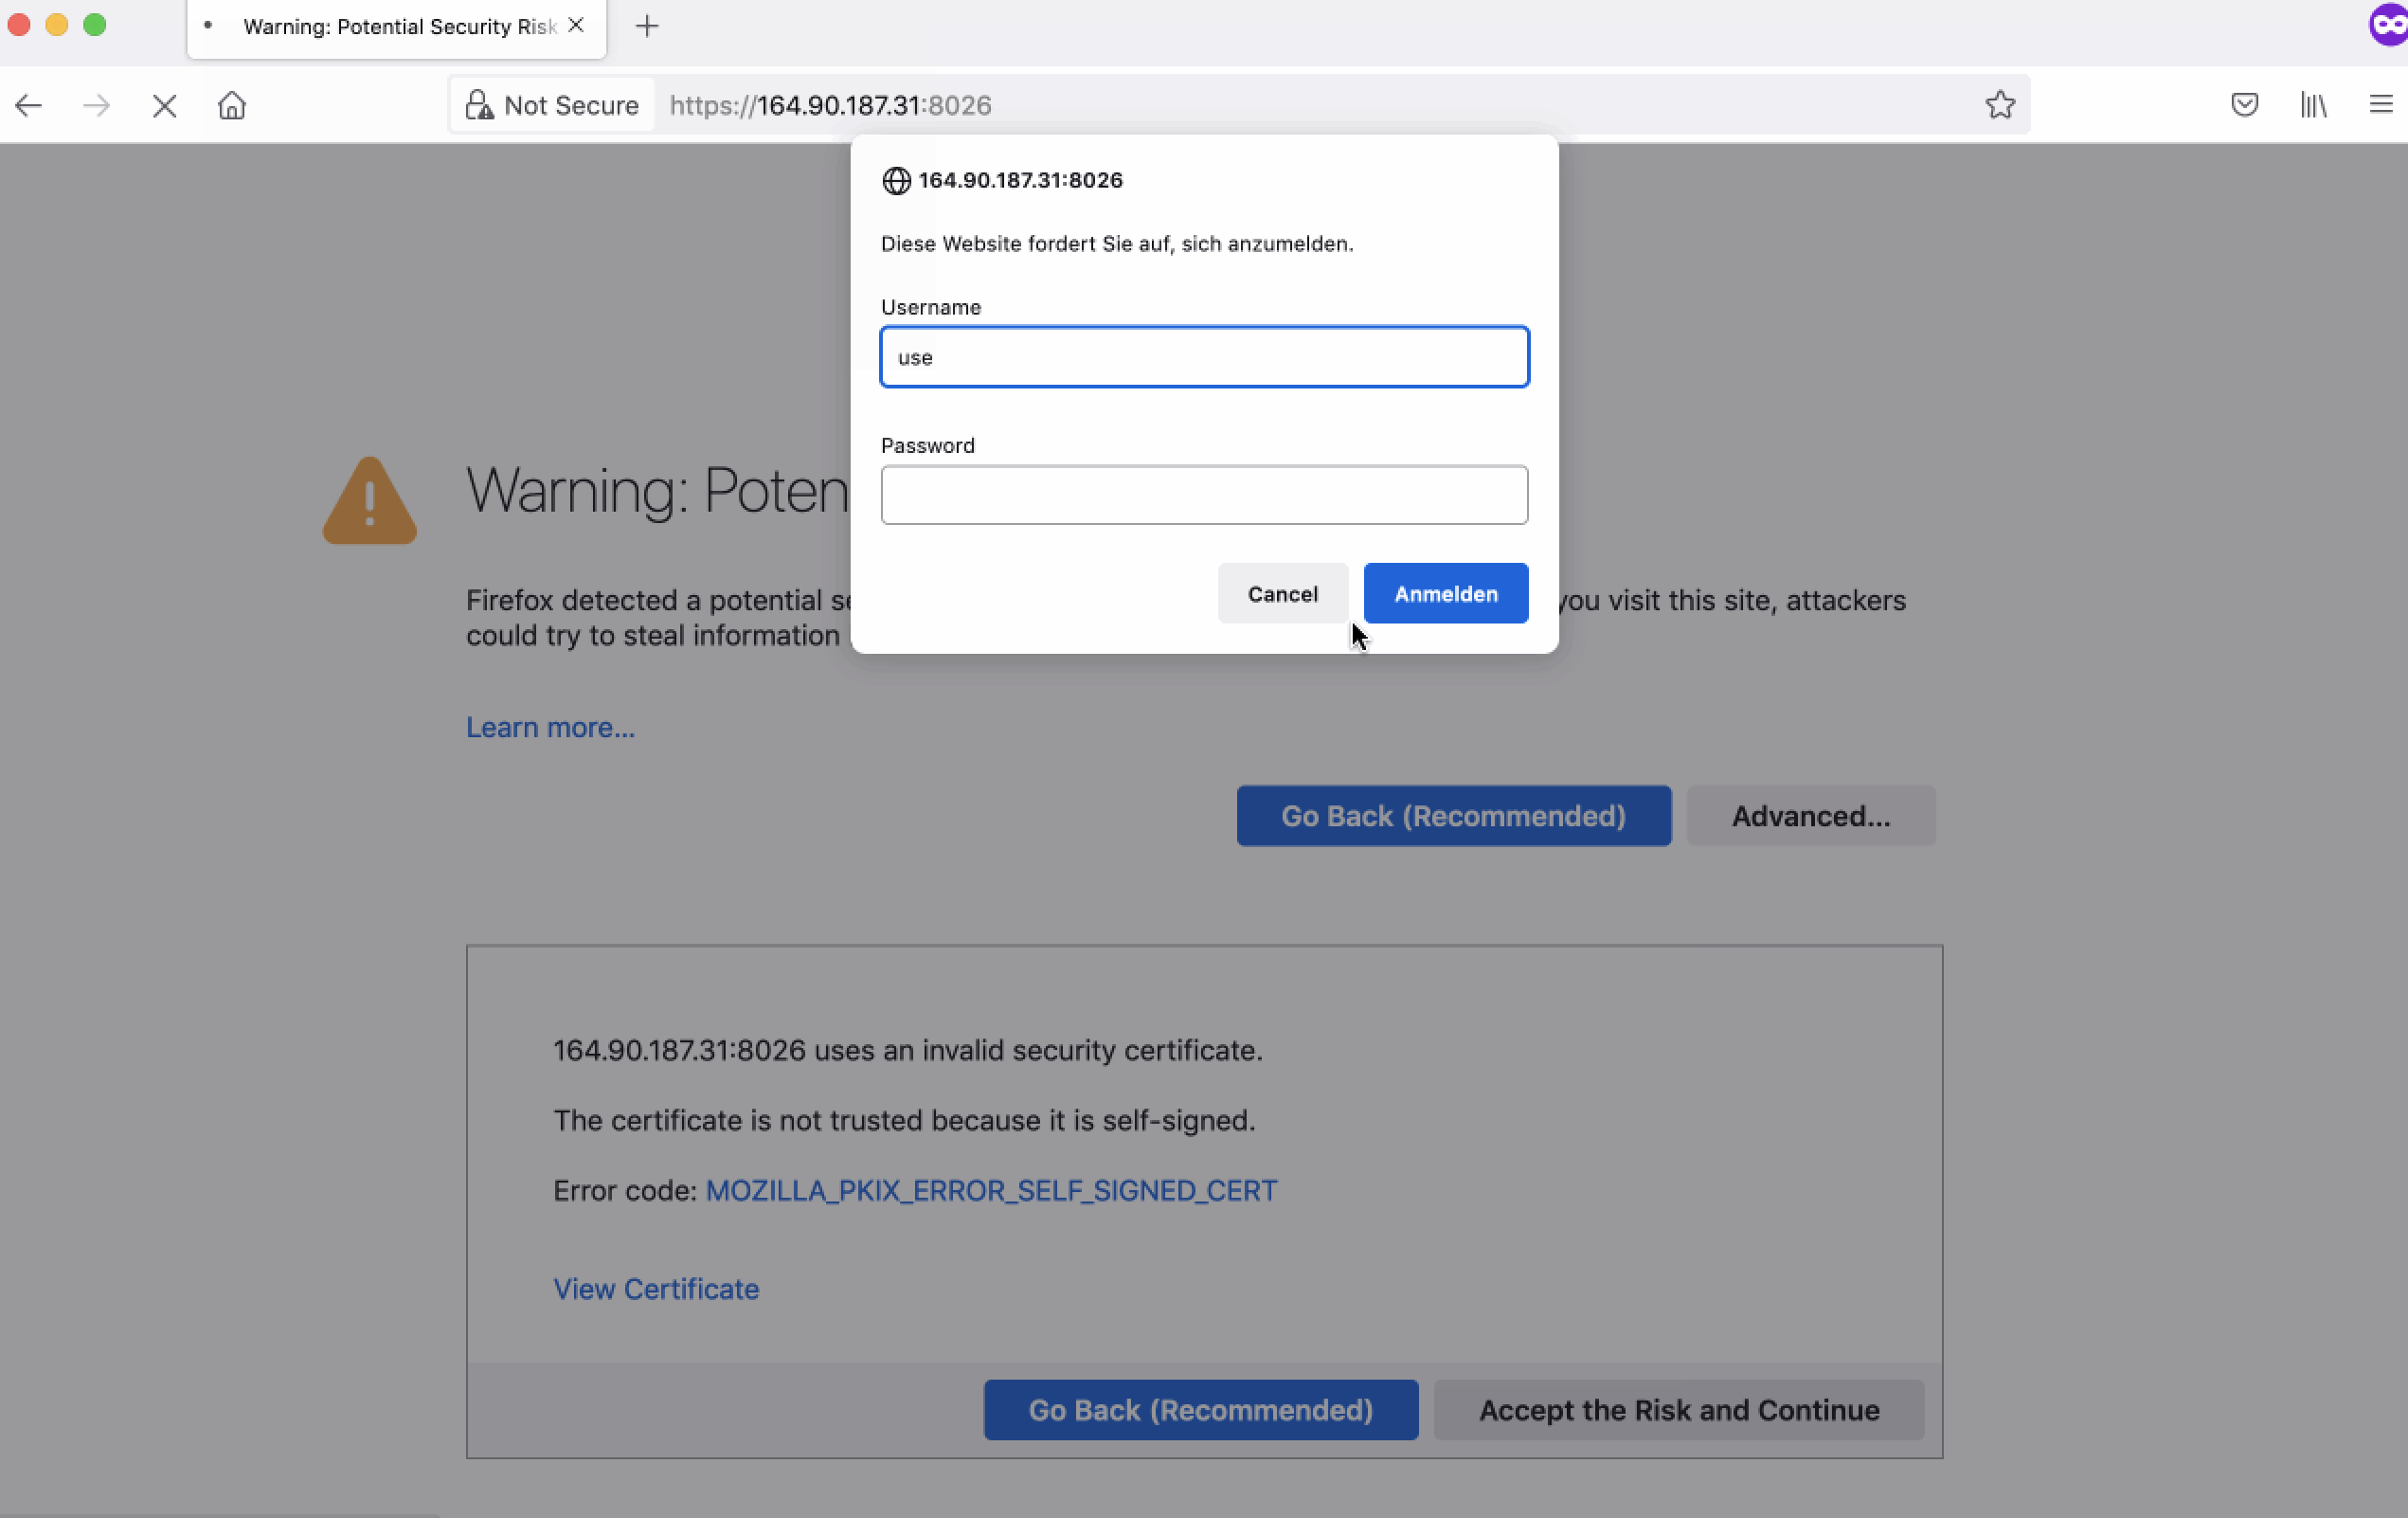
After you accept the risk, authentication window will appear asking you the user and password, that you have set as<ANY_USER_NAME>, <ANY_USER_PASSWORD>
|
||
|
||
|
||
|
||
|
||
## Use Workspace
|
||
|
||
Workspace contains a several small example python project in folder `/home/examples/simple-script`, with scripts that will be used
|
||
for demostration of python tooling. In the examples folder you will also find a script to fetch currency exchange rates, that will be
|
||
usedd to demonstrate scheduler, and a notebook.
|
||
|
||
### [IPython and Notebooks](https://ipython.readthedocs.io/en/stable/)
|
||
|
||
IPython provides a rich toolkit to help you make the most of using Python interactively. One of its main components
|
||
is a powerful interactive Python shell. IPython is very handy. For example, starting with IPython 7.0, and when using
|
||
Python 3.6 and above, IPython offer the ability to run asynchronous code from the REPL.
|
||
|
||
To start IPython kernel, open workspace terminal ad execute `ipython`. Below is an example of installing packages and
|
||
evaluation of async code in IPython shell - something you cannot do in a standard python shell:
|
||
|
||
<p align="center">
|
||
<img src="https://raw.githubusercontent.com/bluxmit/alnoda-workspaces/main/workspaces/python-workspace/img/ipython.png" alt="ipython.png" width="900">
|
||
</p>
|
||
|
||
**NOTE:** in order not to increase the Workspace image size, by default Python Workspace can only render notebooks.
|
||
Workspace does not have installed all the requirements to run notebooks. This is can be done easily. As soon as you
|
||
try to run a cell in the note, you will see a pop-out winndow suggesting to install missing dependencies. You just need to accept.
|
||
|
||
<div align="center" style="font-style: italic;">
|
||
Demo: Install dependencies for notebooks
|
||
</div>
|
||
|
||
<p align="center">
|
||
<img src="https://raw.githubusercontent.com/bluxmit/alnoda-workspaces/main/workspaces/python-workspace/img/notebooks-install.png" alt="notebooks-install.png" width="900">
|
||
</p>
|
||
|
||
### Schedule python jobs
|
||
|
||
Workspace inncludes [Cronicle](https://github.com/jhuckaby/Cronicle) - a powerful scheduling tool, that has a browser-based UI with dashboards,
|
||
allows to configure resource limits for jobs and much more!
|
||
|
||
Python Workspace includes an example script that fetches today's exchange rates:
|
||
|
||
> `cd /home/examples/exchange_rates `
|
||
> `python fetch-rates.py `
|
||
|
||
The script will fetch today's exchange rates from and output result to the folder `/home/static-server/exchange-rates_<DATE>.json`. This
|
||
folder is served by the Static-file server
|
||
|
||
<div align="center" style="font-style: italic;">
|
||
Demo: Fetch exchange rates
|
||
</div>
|
||
|
||
<p align="center">
|
||
<img src="https://raw.githubusercontent.com/bluxmit/alnoda-workspaces/main/workspaces/python-workspace/img/exchange-rates.gif" alt="exchange-rates.gif" width="900">
|
||
</p>
|
||
|
||
Fetching echange rates - is a typical problems for nearly every business, that is working on the international market. You can
|
||
schedule execution of this script to fetch exchange rates daily
|
||
|
||
<div align="center" style="font-style: italic;">
|
||
Demo: Schedule exchange rates
|
||
</div>
|
||
|
||
<p align="center">
|
||
<img src="https://raw.githubusercontent.com/bluxmit/alnoda-workspaces/main/workspaces/python-workspace/img/schedule-exchange-rates.gif" alt="exchange-rates.gif" width="900">
|
||
</p>
|
||
|
||
**NOTE:** Scheduling jobs is especially useful when the Workspace is running on a cloud server.
|
||
[Read here how to launch workspace in cloud](#secure-remote-workspace).
|
||
|
||
|
||
### Python tooling
|
||
|
||
#### Python-report
|
||
|
||
Python-report is a small utility that tryies to generate various reports and artefacts from your python project, such as linting
|
||
report; run tests and make HTML report; make auto-documentation and profiling visualizations. Unit test statistics will be visualised
|
||
with the browser-based dashboard.
|
||
|
||
> `cd /home/examples/simple-script && python-report `
|
||
|
||
The resulting report will be produced to the folder `/home/static-server/<NAME-OF-PYTHON-PROJECT-FOLDER>/<TIMESTAMP>`.
|
||
|
||
<div align="center" style="font-style: italic;">
|
||
Demo: Python report
|
||
</div>
|
||
|
||
<p align="center">
|
||
<img src="https://raw.githubusercontent.com/bluxmit/alnoda-workspaces/main/workspaces/python-workspace/img/python-report.gif" alt="python-report.gif" width="900">
|
||
</p>
|
||
|
||
*(In addition, all pytests statistics will be collected, and available in foldder `/home/static-server/<NAME-OF-PYTHON-PROJECT-FOLDER>`)*.
|
||
|
||
Python-report is a simple bash script `/home/abc/utils/python-report.sh`. You can also use separately any of the toos.
|
||
|
||
#### [Pytest-html-reporter](https://github.com/prashanth-sams/pytest-html-reporter)
|
||
|
||
Pytest-html-reporter generates a beautiful static html report based on pytest framework. These reports result in dashboard website,
|
||
that shows all historical tests and statistics.
|
||
|
||
<p align="center">
|
||
<img src="https://raw.githubusercontent.com/bluxmit/alnoda-workspaces/main/workspaces/python-workspace/img/pytest-html-report.png" alt="pytest-html-report.png" width="750">
|
||
</p>
|
||
|
||
To execute tests, and generate report with Pytest-html-reporter, cd to the python project tests folder,
|
||
and execute `pytest ./ --html-report=./pytest-report`. The results will be produced to the sub-folder `./pytest-report`.
|
||
|
||
For instance, execute tests and generate report for the example python project execute
|
||
|
||
> `cd /home/examples/simple-script && pytest ./ --html-report=/home/static-server/my-pytest-report `
|
||
|
||
the output will be in folder `/home/static-server/my-pytest-report` that is served with a Static-file server
|
||
|
||
<div align="center" style="font-style: italic;">
|
||
Demo: Pytest-html-reporter
|
||
</div>
|
||
|
||
<p align="center">
|
||
<img src="https://raw.githubusercontent.com/bluxmit/alnoda-workspaces/main/workspaces/python-workspace/img/pytest-html-report.gif" alt="pytest-html-report.gif" width="900">
|
||
</p>
|
||
|
||
#### [Pdoc3](https://github.com/pdoc3/pdoc)
|
||
|
||
Auto-generate API documentation for Python projects. Let's generate autodocumentation website for the example python project,
|
||
with output into `` where it can be viewed with Static-file server
|
||
|
||
> ` cd /home/examples/simple-script && pdoc --html --output-dir /home/static-server/pdoc-html ./ `
|
||
|
||
<div align="center" style="font-style: italic;">
|
||
Demo: Pdoc3
|
||
</div>
|
||
|
||
<p align="center">
|
||
<img src="https://raw.githubusercontent.com/bluxmit/alnoda-workspaces/main/workspaces/python-workspace/img/pdoc3.gif" alt="pdoc3.gif" width="900">
|
||
</p>
|
||
|
||
|
||
#### [Vprof](https://github.com/nvdv/vprof)
|
||
|
||
Vprof is a Python package providing rich and interactive visualizations for various Python program characteristics
|
||
such as running time and memory usage.
|
||
|
||
Vprof is a browser-based profiling tool. Here is an example of profiling scripts from the example python project:
|
||
|
||
> `cd /home/examples/simple-script && vprof -H 0.0.0.0 -p 8031 -c cpmh fib.py `
|
||
> `cd /home/examples/simple-script && vprof -H 0.0.0.0 -p 8031 -c cpmh script.py `
|
||
|
||
<div align="center" style="font-style: italic;">
|
||
Demo: Vprof
|
||
</div>
|
||
|
||
<p align="center">
|
||
<img src="https://raw.githubusercontent.com/bluxmit/alnoda-workspaces/main/workspaces/python-workspace/img/vprof.gif" alt="vprof.gif" width="900">
|
||
</p>
|
||
|
||
|
||
#### [SnakeViz](https://jiffyclub.github.io/snakeviz/)
|
||
|
||
SnakeViz is a browser based graphical viewer for the output of Python’s cProfile module. Let's profile
|
||
and visualize one of python modules in the example project:
|
||
|
||
> `cd /home/examples/simple-script && python -m cProfile -o script.prof script.py `
|
||
> `snakeviz -s -p 8030 -H 0.0.0.0 script.prof `
|
||
|
||
You will see thae link appeared in the terminal, open it in browser
|
||
|
||
<div align="center" style="font-style: italic;">
|
||
Demo: SnakeViz
|
||
</div>
|
||
|
||
<p align="center">
|
||
<img src="https://raw.githubusercontent.com/bluxmit/alnoda-workspaces/main/workspaces/python-workspace/img/snakeviz.gif" alt="snakeviz.gif" width="900">
|
||
</p>
|
||
|
||
#### [Flameprof](https://github.com/baverman/flameprof/)
|
||
|
||
Flameprof is a Flamegraph generator for python's cProfile stats.
|
||
|
||
Let's profile and visualize one of python modules in the example project:
|
||
|
||
> `cd /home/examples/simple-script && python -m cProfile -o script.prof script.py `
|
||
> ` flameprof script.prof > script.svg `
|
||
|
||
<div align="center" style="font-style: italic;">
|
||
Demo: Flameprof
|
||
</div>
|
||
|
||
<p align="center">
|
||
<img src="https://raw.githubusercontent.com/bluxmit/alnoda-workspaces/main/workspaces/python-workspace/img/flameprof.png" alt="flameprof.png" width="750">
|
||
</p>
|
||
|
||
|
||
#### [Pyinstrument](https://pypi.org/project/pyinstrument/3.0.0b3/)
|
||
|
||
Pyinstrument is a Python profiler. A profiler is a tool to help you 'optimize' your code - make it faster.
|
||
It sounds obvious, but to get the biggest speed increase you must focus on the slowest part of your program.
|
||
Pyinstrument helps you find it!
|
||
|
||
Profile and visualize one of python modules in the example project:
|
||
|
||
> `mkdir -p /home/static-server/profiling/basic-python-script `
|
||
> `pyinstrument -t -r html -o /home/static-server/profiling/basic-python-script/p2 script.py `
|
||
|
||
<div align="center" style="font-style: italic;">
|
||
Demo: Pyinstrument
|
||
</div>
|
||
|
||
<p align="center">
|
||
<img src="https://raw.githubusercontent.com/bluxmit/alnoda-workspaces/main/workspaces/python-workspace/img/pyinstrument.png" alt="pyinstrument.png" width="900">
|
||
</p>
|
||
|
||
|
||
#### [cProfile](https://docs.python.org/3/library/profile.html#module-cProfile)
|
||
|
||
cProfile is recommended for most users; it's a C extension with reasonable overhead that makes it suitable
|
||
for profiling long-running programs. Profile and visualize one of python modules in the example project:
|
||
|
||
> `cd /home/examples/simple-script && python -m cProfile script.py >> /home/static-server/cprof.tx `
|
||
|
||
|
||
#### [Pylint-json2html](https://github.com/Exirel/pylint-json2html)
|
||
|
||
A pylint JSON report file to HTML: pylint is used to generate a JSON report, and this tool will transform this report into
|
||
an HTML document:
|
||
|
||
> `pylint script.py | pylint-json2html -f jsonextended -o script.html `
|
||
|
||
<div align="center" style="font-style: italic;">
|
||
Demo: Pylint-json2html demo
|
||
</div>
|
||
|
||
<p align="center">
|
||
<img src="https://raw.githubusercontent.com/bluxmit/alnoda-workspaces/main/workspaces/python-workspace/img/pylint.png" alt="pylint.png" width="750">
|
||
</p>
|
||
|
||
#### Pre-commit
|
||
|
||
Git hook scripts are useful for identifying simple issues before submission to code review. We run our hooks on every commit
|
||
to automatically point out issues in code such as missing semicolons, trailing whitespace, and debug statements. By pointing
|
||
these issues out before code review, this allows a code reviewer to focus on the architecture of a change while not wasting
|
||
time with trivial style nitpicks.
|
||
|
||
The example python project has a pre-commit configuration file:
|
||
|
||
> `cd /home/examples/simple-script && pre-commit install `
|
||
> `pre-commit run --all-files `
|
||
|
||
|
||
### Common workspace actions
|
||
|
||
Common actions you'd do in the workspace
|
||
|
||
- installation of new applications and runtimes
|
||
- edit files, write code, scripts
|
||
- build, compile and execute code
|
||
- start/stop applications and services
|
||
- schedule tasks and scripts
|
||
- process data
|
||
|
||
#### Install applications
|
||
|
||
Use workspace workspace terminal to install new applications.
|
||
Install with ```sudo apt install```. The default *abc* user is allowed to install packages.
|
||
|
||
For example, in order to install [Emacs text editor](https://www.gnu.org/software/emacs/) open workspace terminal, and execute
|
||
|
||
> `sudo apt install emacs`
|
||
|
||
|
||
#### Schedule jobs with Cron
|
||
|
||
Schedule execution of any task with cron - a time-based job scheduler in Unix-like computer operating systems.
|
||
|
||
Open workspace terminal, and execute
|
||
|
||
> `crontab -e`
|
||
|
||
*(chose [1] nano as editor on the first time)*
|
||
In the end of the opened file add line
|
||
|
||
> `* * * * * echo $(whoami) >> /home/cron.txt`
|
||
|
||
This will print every minute username to file */home/cron.txt* . *(Hit Ctrl+X to exit nano)*
|
||
|
||
Hint: example of cron job definition:
|
||
```
|
||
.---------------- minute (0 - 59)
|
||
| .------------- hour (0 - 23)
|
||
| | .---------- day of month (1 - 31)
|
||
| | | .------- month (1 - 12) OR jan,feb,mar,apr ...
|
||
| | | | .---- day of week (0 - 6) (Sunday=0 or 7) OR sun,mon,tue,wed,thu,fri,sat
|
||
| | | | |
|
||
* * * * * command to be executed
|
||
```
|
||
|
||
**NOTE** you can disconnect from the image and close terminal - cron will continue working.
|
||
|
||
> Instead of cron you might want to use Cronicle - a tool with Web UI, and a great list of features
|
||
> that will provide you with the dashboard, list of executions and statistics, even let you ser limis
|
||
> on resources for each jobs, and create depenndencies between jobs.
|
||
|
||
#### Python
|
||
Python and Pip are installed. To use python console, open workspace terminal and execute
|
||
|
||
> `python`
|
||
|
||
install python package with pip, for
|
||
|
||
> `pip install pandas`
|
||
|
||
If you are planning to work with python, we recommend to install IPython, that provides a rich toolkit to help
|
||
you make the most of using Python interactively. Install and start ipython
|
||
|
||
> ```pip install ipython```
|
||
> `ipython`
|
||
|
||
#### Node.js
|
||
We recommend to use nodeenv to create different node environments.
|
||
|
||
For example, open workspace terminal, create folder npmgui, and activate environment with node v. 12.18.3 and npm v.6.0.0
|
||
|
||
> `cd /home`
|
||
> `mkdir npmgui; cd npmgui`
|
||
> `nodeenv --node=12.18.3 --npm=6.0.0 env`
|
||
|
||
Let's install package and start node application
|
||
|
||
> `. env/bin/activate && npm i -g npm-gui`
|
||
> `npm-gui 0.0.0.0:8030`
|
||
|
||
Open your browser on http://localhost:8030/
|
||
|
||
**NOTE:** If you close terminal, the application will stop. See how to [start applications that reamin live after closing a workspace terminal](#run-applications-and-services-inside-the-workspace)
|
||
|
||
|
||
#### Run applications and services inside the workspace
|
||
|
||
If you want application to keep running after workspace terminal is closed start it with **"&!"** at the end.
|
||
|
||
For example, in the last section we started *npm-gui* tool with command `npm-gui 0.0.0.0:8030`. If you close the workspace terminal,
|
||
this application witll stop running. To keep it running after terminal is closed, execute
|
||
|
||
> `npm-gui 0.0.0.0:8030 &!`
|
||
|
||
Now, if you disconnect from the workspace and close terminal, the application will continue running in the workspace, untill [workspace is stopped](#start-and-stop-workspaces).
|
||
|
||
|
||
|
||
## Manage workspaces
|
||
|
||
Workspace is just a docker container. You can start, stop, delete and do anything you can do with docker images and containers.
|
||
|
||
There are two concepts to keep in mind: **images** and **containers**. Images are workspace blueprints. For example, **alnoda/python-workspace** -
|
||
is an image. When you execute this command
|
||
|
||
```sh
|
||
docker run --name space-1 -d -p 8020-8035:8020-8035 alnoda/python-workspace
|
||
```
|
||
you create container called **space-1** from the image **alnoda/python-workspace**. You can create any number of containers, but you need to
|
||
[map different ports to each of them](#multiple-workspaces).
|
||
|
||
Container - is your workspace. You can start, stop and delete them. You can run multiple workspace containers at the same time, or work with
|
||
one workspace at a time.
|
||
|
||
From the workspace (which is a container) you can create new image. This is called **commit docker image**.
|
||
Essentially, this means *"take my workspace and create new image with all the changes I've done in my workspace*"
|
||
|
||
### Start and stop workspaces
|
||
|
||
The workspace started in daemon mode will continue working in the background.
|
||
|
||
See all the running docker containers
|
||
|
||
```
|
||
docker ps
|
||
```
|
||
|
||
Stop workspace
|
||
|
||
```sh
|
||
docker stop space-1
|
||
```
|
||
Workspace is stopped. All the processes and cron jobs are not running.
|
||
|
||
See all docker conntainers, including stopped
|
||
|
||
```
|
||
docker ps -a
|
||
```
|
||
|
||
Start workspace again. Processes and cron jobs are resumed.
|
||
|
||
```sh
|
||
docker start space-1
|
||
```
|
||
|
||
Delete workspace container (all work will be lost)
|
||
|
||
```
|
||
docker rm space-1
|
||
```
|
||
|
||
### Create new workspace image
|
||
|
||
Having made changes, you can commit them creating new image of the workspace. In order to create new workspace image with the
|
||
name "space-image" and version "0.2" execute
|
||
|
||
```
|
||
docker commit space-1 space-image:0.2
|
||
```
|
||
|
||
Run new workspace with
|
||
|
||
```
|
||
docker run --name space2 -d space-image:0.2
|
||
```
|
||
|
||
The new workspace accommodates all the changes that you've made in your space-1. Hence you can have versions of your workspaces.
|
||
Create different versions before the important changes.
|
||
|
||
### Manage workspace images
|
||
|
||
See all docker images
|
||
|
||
```
|
||
docker images
|
||
```
|
||
|
||
Delete workspace image entirely
|
||
|
||
```
|
||
docker rmi -f alnoda/python-workspace
|
||
```
|
||
|
||
**NOTE:** you cannot delete image if there is a running container created from it. Stop container first.
|
||
|
||
### Save and load workspace images
|
||
|
||
After you commit workspace container, and create new image out of it, you can push it to your docker registry or save it in a file.
|
||
|
||
#### Save workspace as a file
|
||
|
||
Assuming you created new image **space-image:0.4** from your workspace, you can save it as a tar file
|
||
|
||
```
|
||
docker save space-image:0.4 > space-image-0.4.tar
|
||
```
|
||
|
||
We can delete the image with
|
||
|
||
```
|
||
docker rmi -f space-image:0.4
|
||
```
|
||
|
||
And restore it from the tar file
|
||
|
||
```
|
||
docker load < space-image-0.4.tar
|
||
```
|
||
|
||
#### Push workspace to a docker registry
|
||
|
||
A better way to manage images is docker registries. You can use docker registries in multiple clouds. They are cheap annd very convenient.
|
||
Check out for example, [Registry in DigitalOcean](https://www.digitalocean.com/products/container-registry/) or in [Scaleway container registry](https://www.scaleway.com/en/container-registry/). There are more.
|
||
|
||
Pushing image to registry is merely 2 extra commands: 1) tag image; 2) push image
|
||
|
||
You will be able to pull image on any device, local or cloud.
|
||
|
||
### Move workspace to the cloud
|
||
|
||
Ease of running workspace in cloud, and ability to move workspaces between local machine and remote server -
|
||
is one of the main features of the workspace, and the reasonn why the workspace is entirely in docker.
|
||
|
||
It is often a case that experiment, which started on personal notebook require more computational
|
||
resources, must be running for a long period of time, or executed periodically. All of these cases are
|
||
the reasons to move a workspace to the cloud server. Usually it is a hassle, but this workspace can be moved
|
||
to the remote server easily.
|
||
|
||
The easiest way to move workspace to the cloud is to get your private docker registry. Then moving a workspace from a laptop to
|
||
a remote server is only 3 commands:
|
||
|
||
1. [Commit workspace to the a image](#create-new-workspace-image)
|
||
2. [Push workspace to your docker registry](https://docs.docker.com/engine/reference/commandline/push/)
|
||
3. ssh to remote server, and [run workspace there](#run-on-remote-server)
|
||
|
||
If you don't want to use container registry, then there are 2 steps more involved:
|
||
|
||
1. [Commit workspace to the a image](#create-new-workspace-image)
|
||
2. [Save image to file](#save-workspace-as-a-file)
|
||
3. Copy file to remote server. There are many options:
|
||
- Launch filexchange workspace on the remote server
|
||
- Use [cyberduck](https://cyberduck.io/)
|
||
- use [scp](https://linuxize.com/post/how-to-use-scp-command-to-securely-transfer-files/)
|
||
4. [Load workspace image from file](#save-and-load-workspace-images) on the remote server
|
||
5. [Start workspace on the remote server](#run-on-remote-server)
|
||
|
||
|
||
## Workspace Documentation
|
||
|
||
Workspace can easily be customized for your specific needs. You can also use Workspace for a complex project, and might need a
|
||
tool to write remarks, plans, action plans. As well as architectural artefacts for the components you wish to implement. Often it is
|
||
also needed to store somewhere snippets of code or shell commands that you often use in your work. It would be uncomfortable to use extra
|
||
tool or solution outside of the Workspace to store such remarks.
|
||
|
||
Because Workspace is a complete self-contained environment, it include tools to make remarks, plans, store pieces of code, write anything,
|
||
and even build complete static documentation websites that you can host on GitHub Pages for example.
|
||
|
||
[MkDocs](https://www.mkdocs.org/) is a part of the workspace, and its dev server is up and running every time you start the Workspace. In fact,
|
||
the workspace UI (port 8020 by default) - is served by the MkDocs dev server.
|
||
|
||
You can easily modify the UI, add more pages or update existing pages. The changes will be updated immediately without the need to do anything.
|
||
|
||
MkDocs project is located in the `/home/docs/` folder. It has subfolder called `docs` (so it is `/home/docs/docs/`) where all the Markdown documents
|
||
are stored. Simply create new `.md` file there. And add reference about this file to the MkDocs config `/home/docs/mkdocs.yml`. You will see that
|
||
the new page has appeared in your Workspace UI - it has live reload, and you dont need to do annything, just write in the markdown files.
|
||
|
||
|
||
<p align="center">
|
||
<img src="https://raw.githubusercontent.com/bluxmit/alnoda-workspaces/main/workspaces/python-workspace/img/workspace-docs.gif" alt="workspace-docs" width="900">
|
||
</p>
|
||
|
||
You can easily build beautiful static website from this documentation
|
||
|
||
> `cd /home/docs/ && mkdocs build -d /home/static-server/my-doc-website`
|
||
|
||
The resulting HTML website is in folder `/home/static-server/my-doc-website`, you can view it with Static File Server and download to local
|
||
with Filebrowser.
|
||
|
||
You can make even more stunning documentation websites with advanced Markdown features using [MkDocs-Magicspace](https://mkdocs-magicspace.alnoda.org/).
|
||
|
||
|
||
|
||
|
||
|
||
|
||
|
||
|
||
|